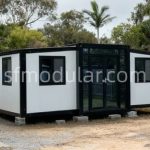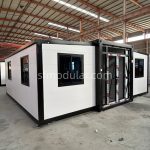
How to Install an Expandable Folding House
At Xiamen Sunfine Architect & Construction Co., Ltd., we don’t just sell expandable and folding container houses – we manufacture them.
With years of experience in modular housing production, Sunfine has helped hundreds of global clients successfully install expandable homes in countries such as Australia, New Zealand, and the USA.
This detailed step-by-step guide is written by our engineering and installation team, showing you how to unfold and install a Sunfine expandable folding house safely and efficiently.
Before we start, remember that every Sunfine house can be fully customized — from layout and color to insulation and fittings.
Click here to design your own expandable house →
Let’s begin with what makes a Sunfine folding house so easy to install.
Fully Customizable Expandable Houses
Every Sunfine house can be fully customized — from layout and color to insulation and fittings.
Table of Contents
Product Introduction & Overview
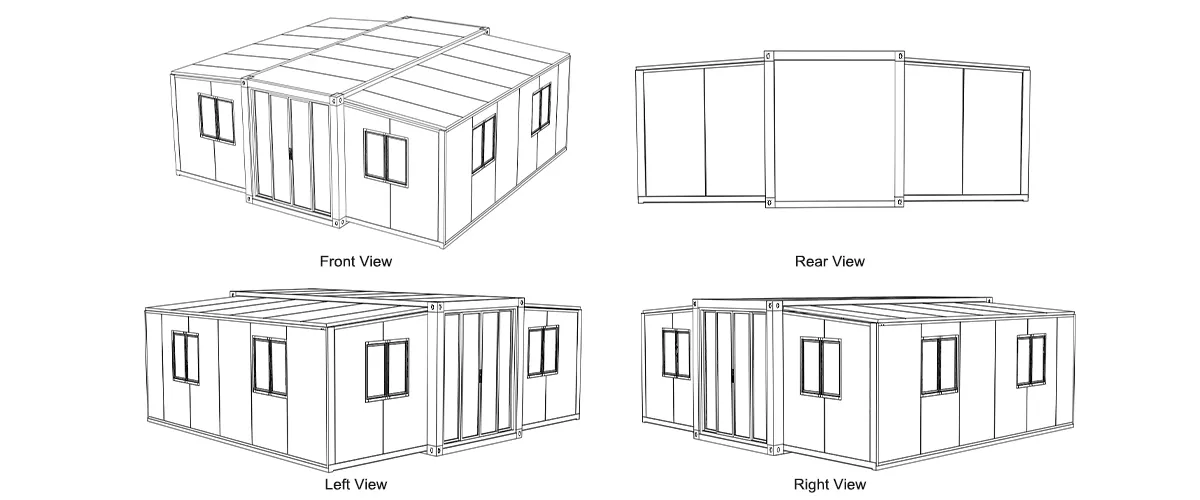
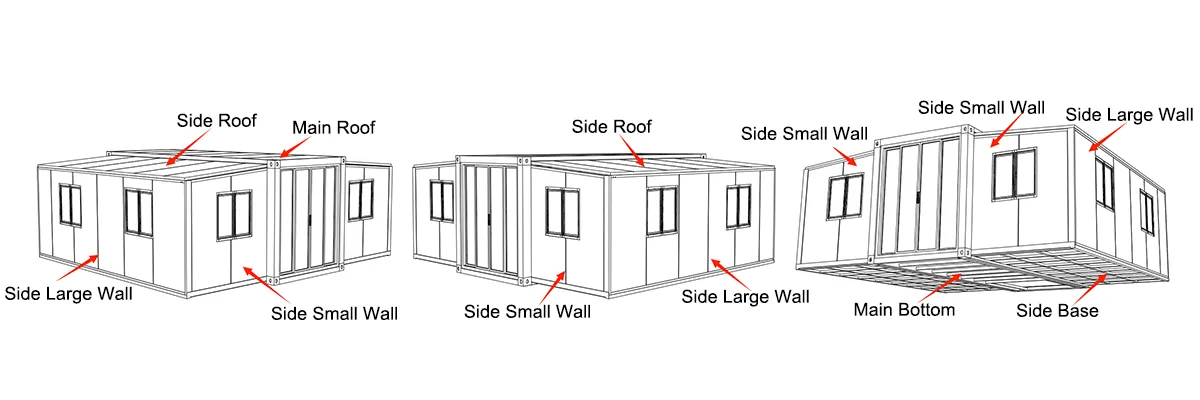
The 20ft folding expandable house is engineered for fast deployment, convenient transportation, and efficient modular living. Its foldable structure allows quick installation while maintaining high structural strength and long-term durability.
Pre-Installation Precautions & Safety Measures
Carefully Read the Installation Manual
Before starting installation, thoroughly read the installation manual and comply with local laws, regulations, industry standards, and labor protection guidelines.
Wear Personal Protective Equipment (PPE)
Select an Appropriate Installation Site
Choose a solid and stable surface to place or install the product.
Prepare the site by:
Removing weeds
Leveling, compacting, and hardening the ground
Ensuring proper drainage and moisture prevention to avoid ground collapse
Weather and Safety Considerations
In compliance with the Labor Law of the People’s Republic of China and Safety Regulations for High-Altitude Work, cease all work during severe weather conditions, including winds exceeding Level 4, rain, snow, heavy fog, or extreme heat.
Do not alter the structural framework of the product without authorization.
Required Accessories for Installation
(Note: The following list is for reference only. The actual components may vary based on the room configuration specified by the customer.)
Required Tools, Heavy Machinery, and Installation Assistance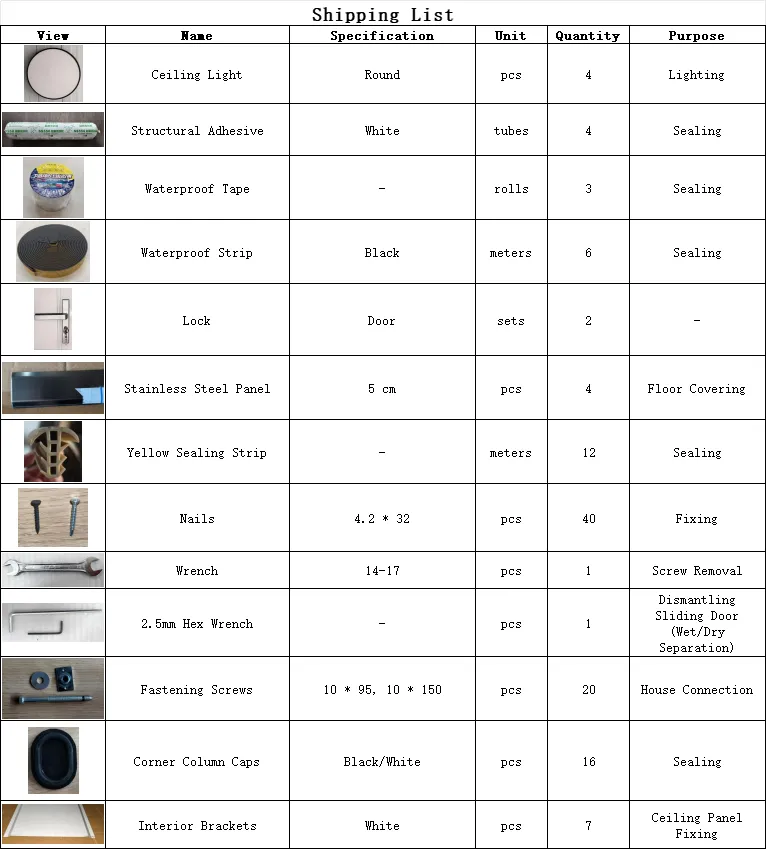
Due to the weight of the product, the installation process requires:
Crane: For lifting and positioning the product.
4-5 Personnel: To assist with installation tasks.
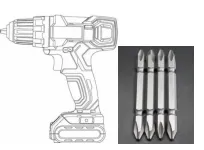
Tools Needed
Electric Drill (also known as a Hand Drill)
Phillips Drill Bit
Expandable House Installation Process
Unloading the Cargo
Before installation, remove all items from the shipping container.
Positioning the Product
Place the expandable house on a pre-prepared hardened surface and ensure the final location is confirmed before installation.
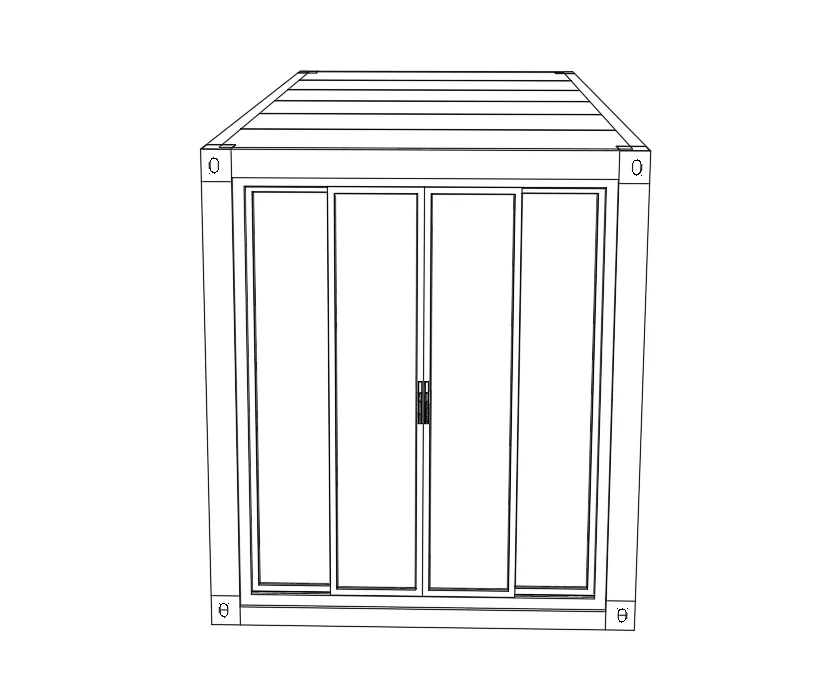
Side Fixed Panel Removal
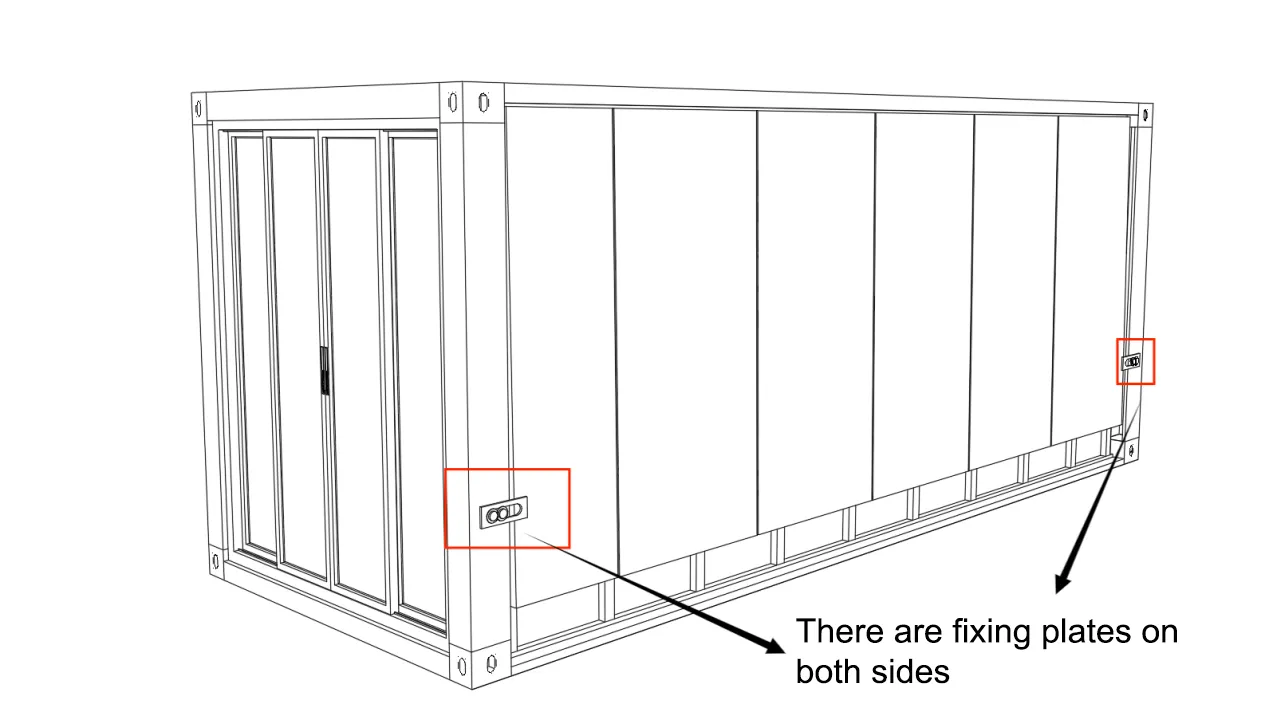
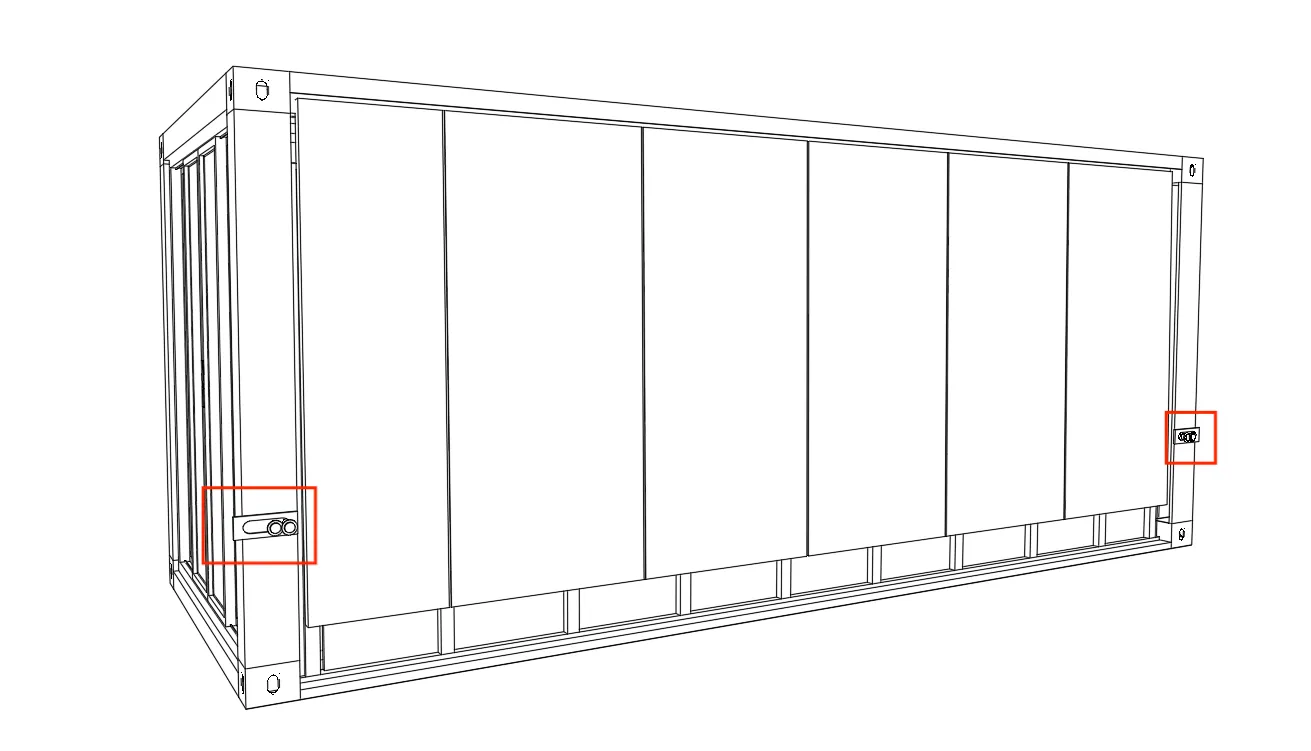
Locate the side fixed panels, loosen the screws, and slide them outward to free the expandable structure.
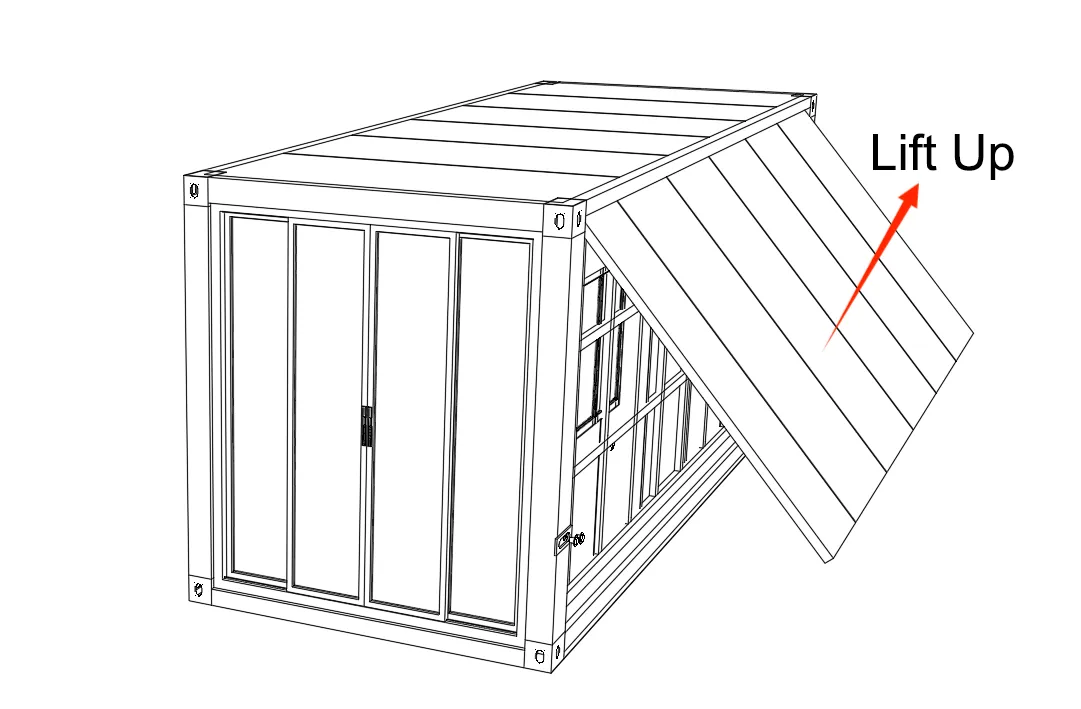
Lift the Side Roof & Top Panel
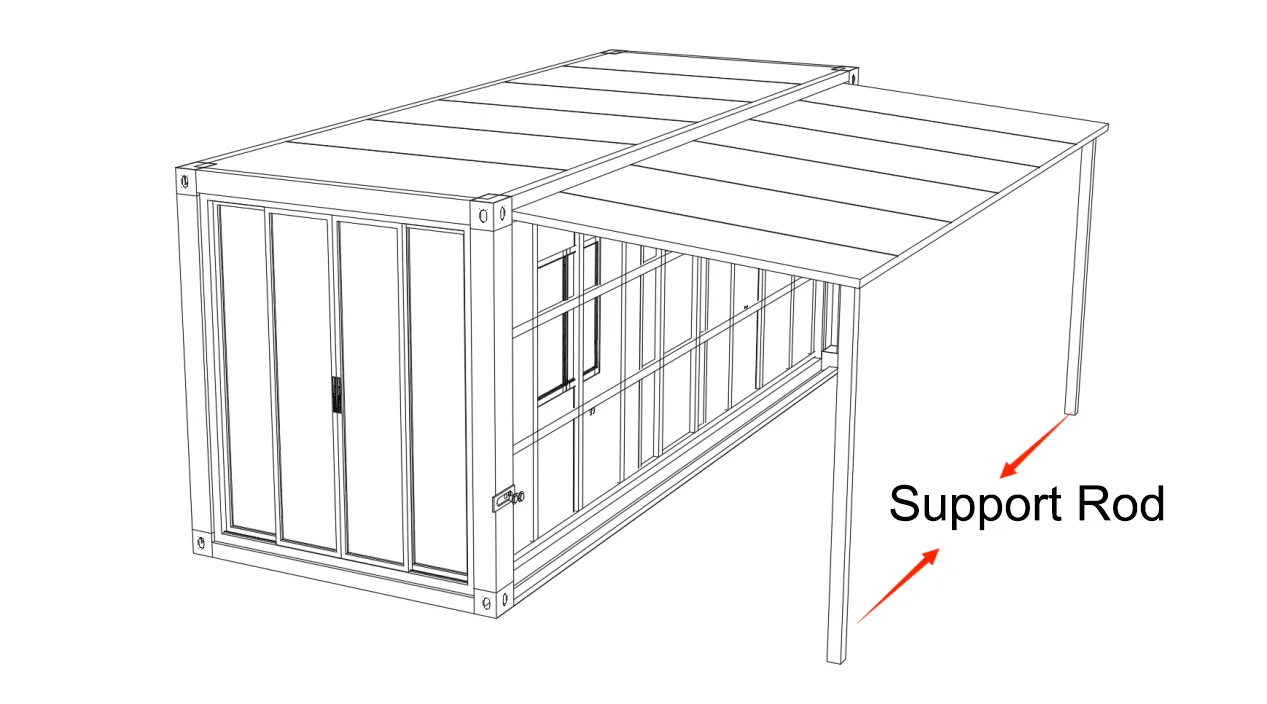
Carefully raise the side roof and top panel, then secure them using support rods or a crane to prevent accidental movement.
Expand Walls & Floor Panels
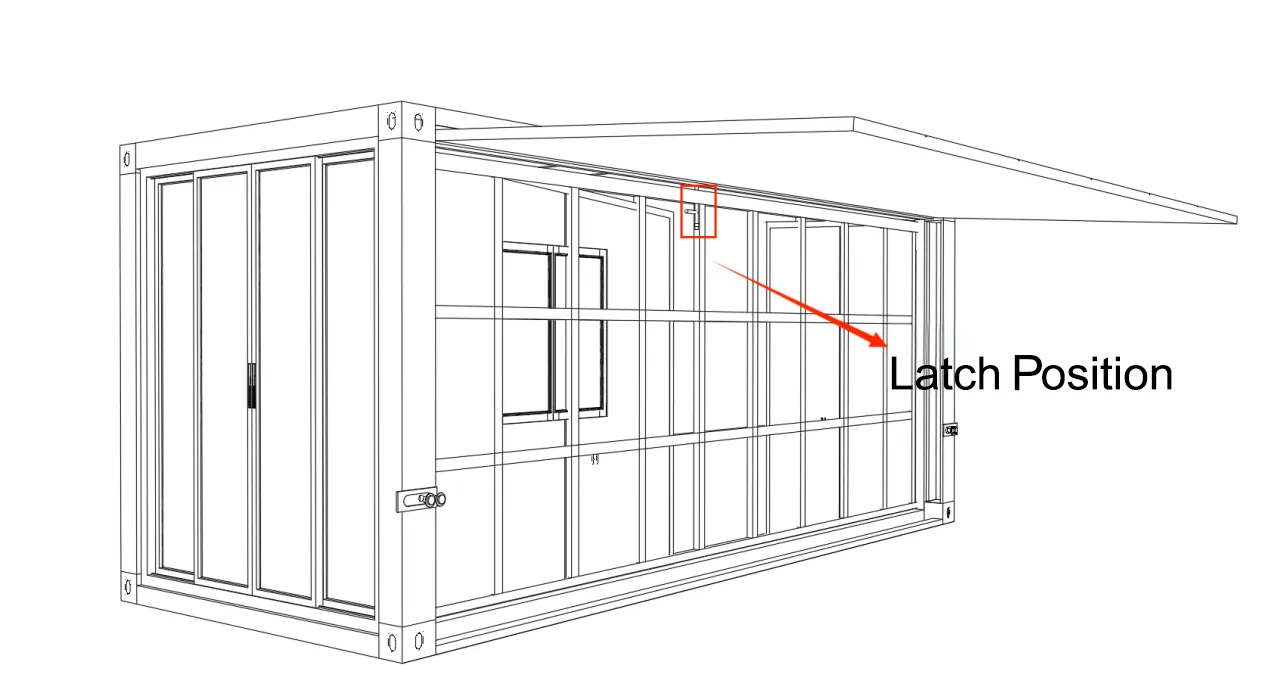
Unlock the bottom latch, lower the floor panel, unfold the side large walls, and expand the front and rear small walls into their designated positions.
Secure Screws & Connection Points
Tighten all screw holes and fixing points on small walls, large walls, and roof sections using the specified screws and tools.
Waterproof Sealing Installation
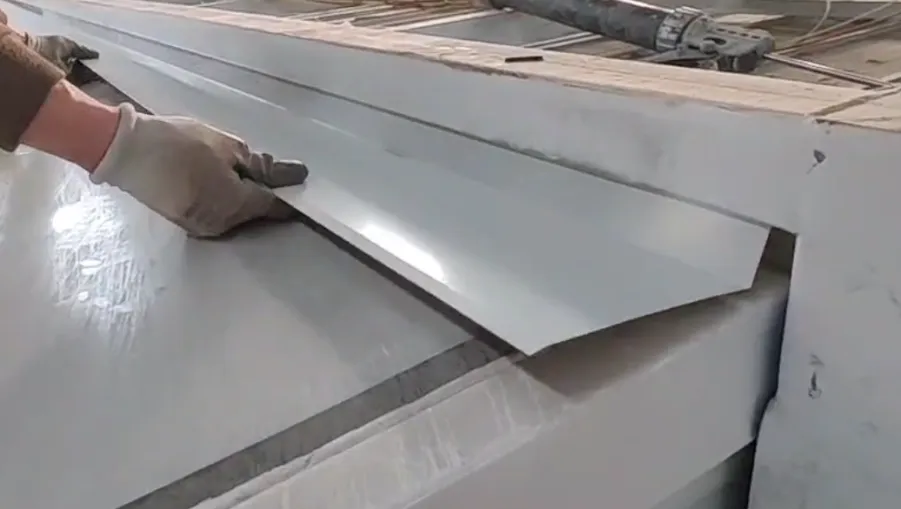
Apply yellow sealing strips, structural adhesive, stainless steel panels, and waterproof tape to ensure reliable sealing and waterproof protection.
Install Electrical & Interior Components
Complete the installation of bedroom lights, door locks, sockets, lighting switches, and indoor ceiling brackets according to the provided instructions and wiring diagrams.
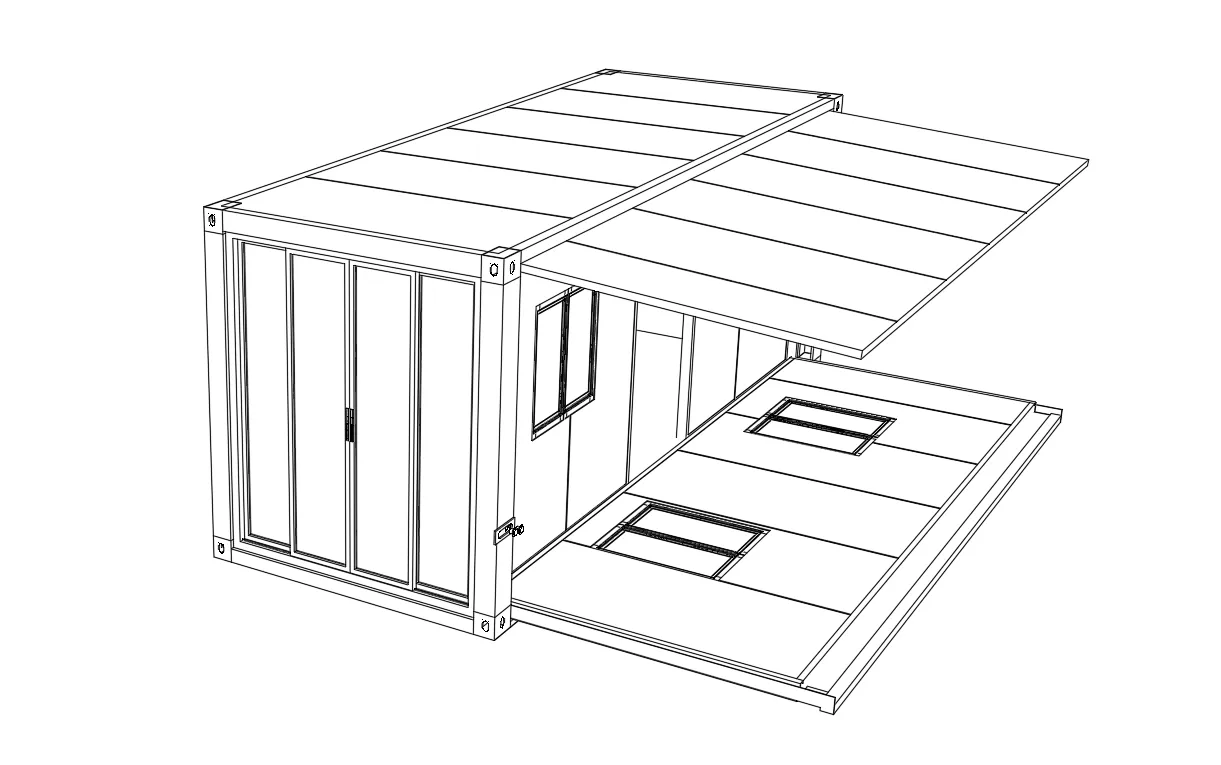
Unfold the Side Large Wall
Expand the side large wall to its full position.
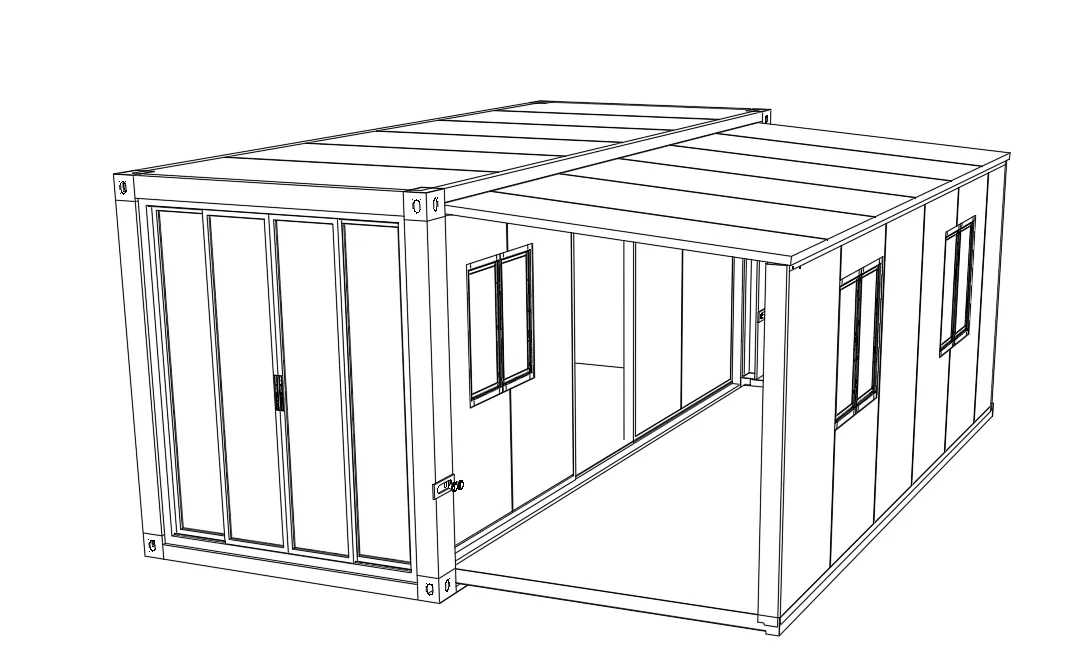
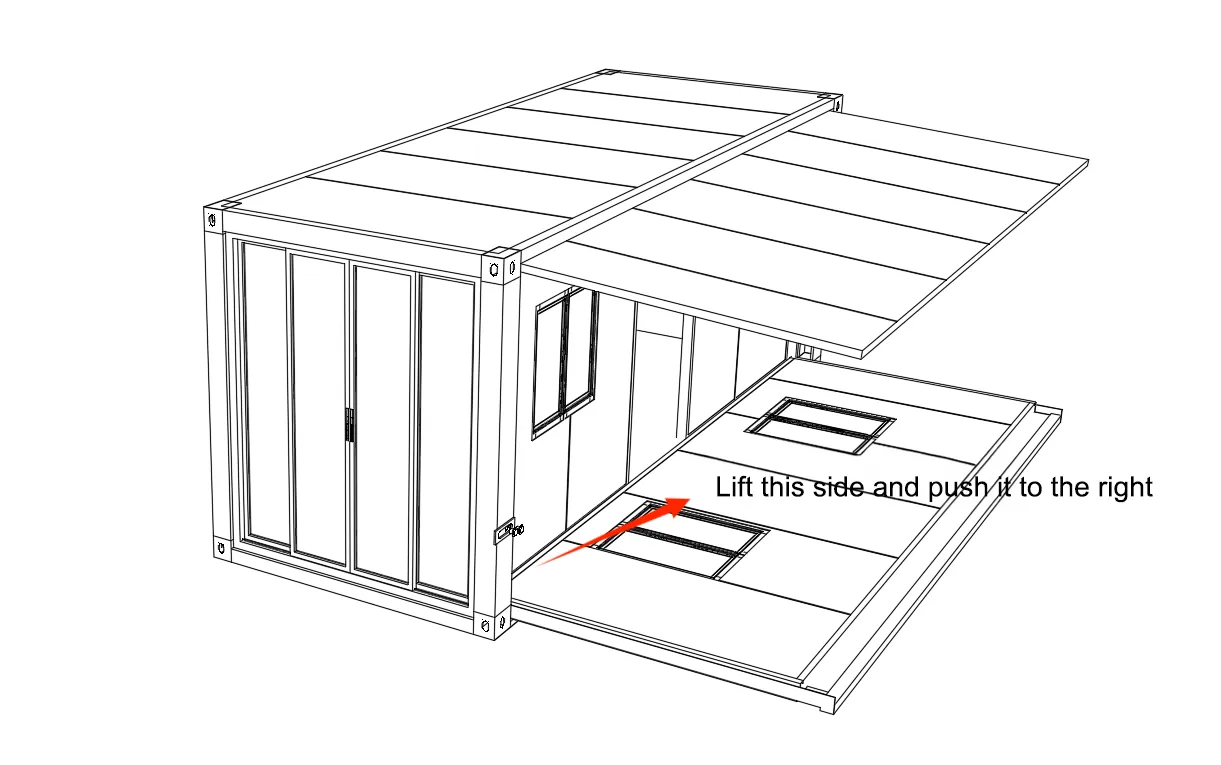
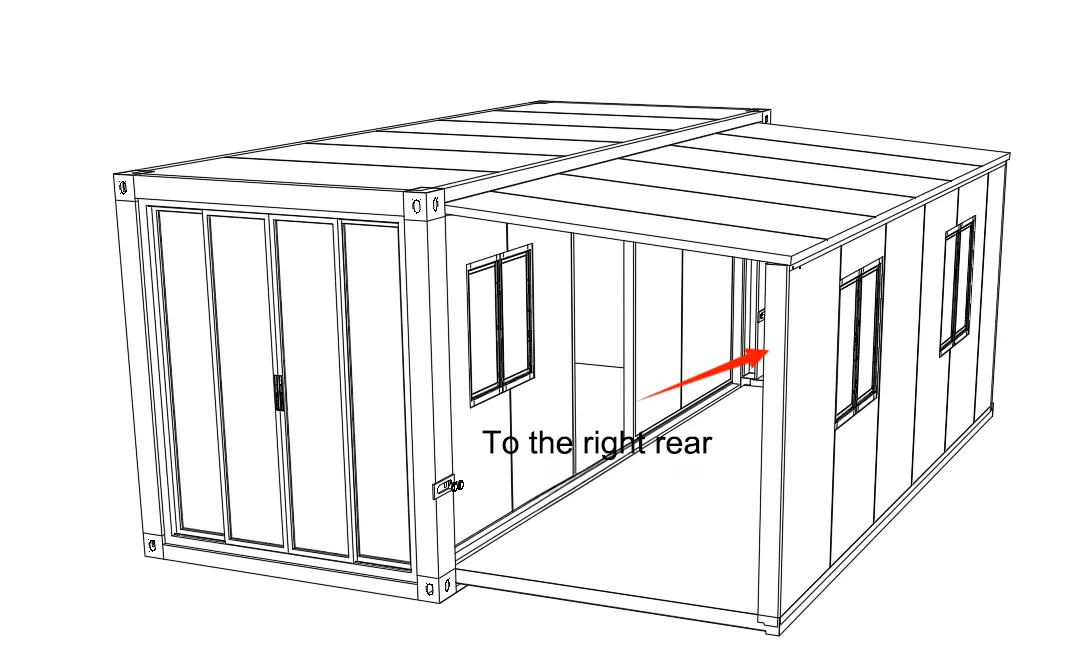
Unfold the Rear Small Wall
Carefully expand the rear small wall into its designated position.
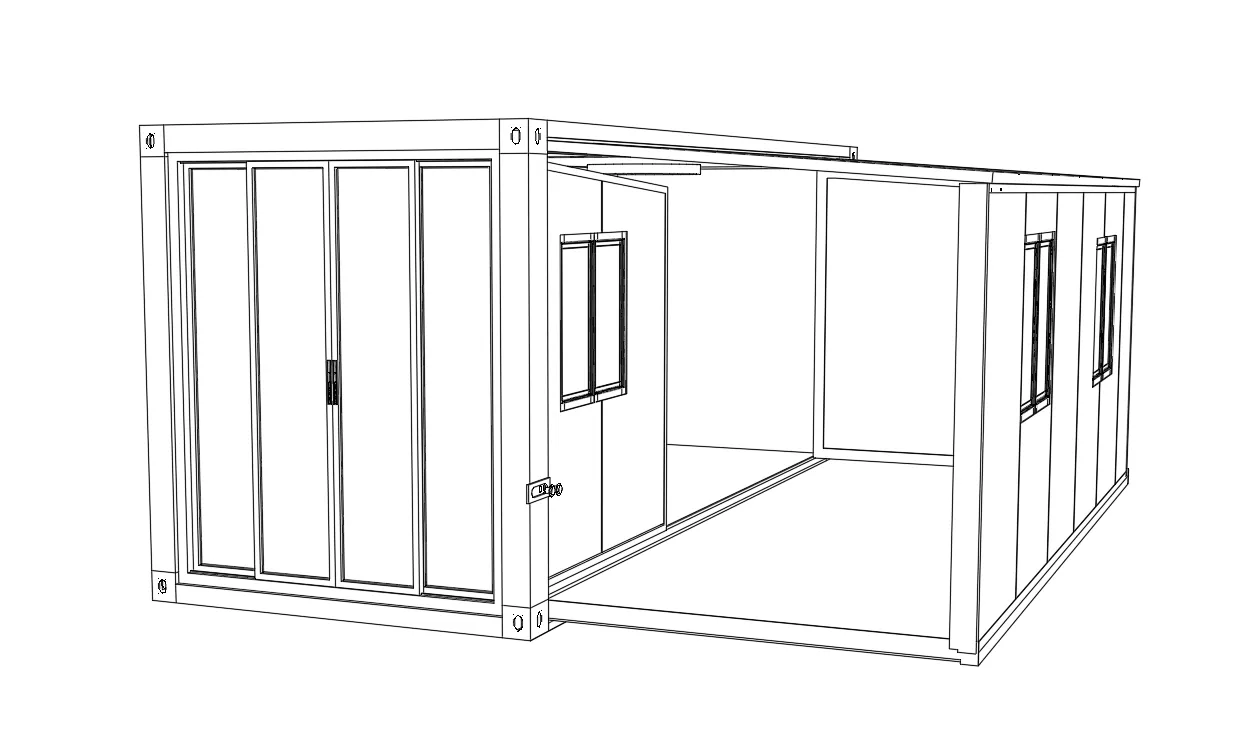
Unfold the Front Small Wall
Expand the front small wall and secure it in place.
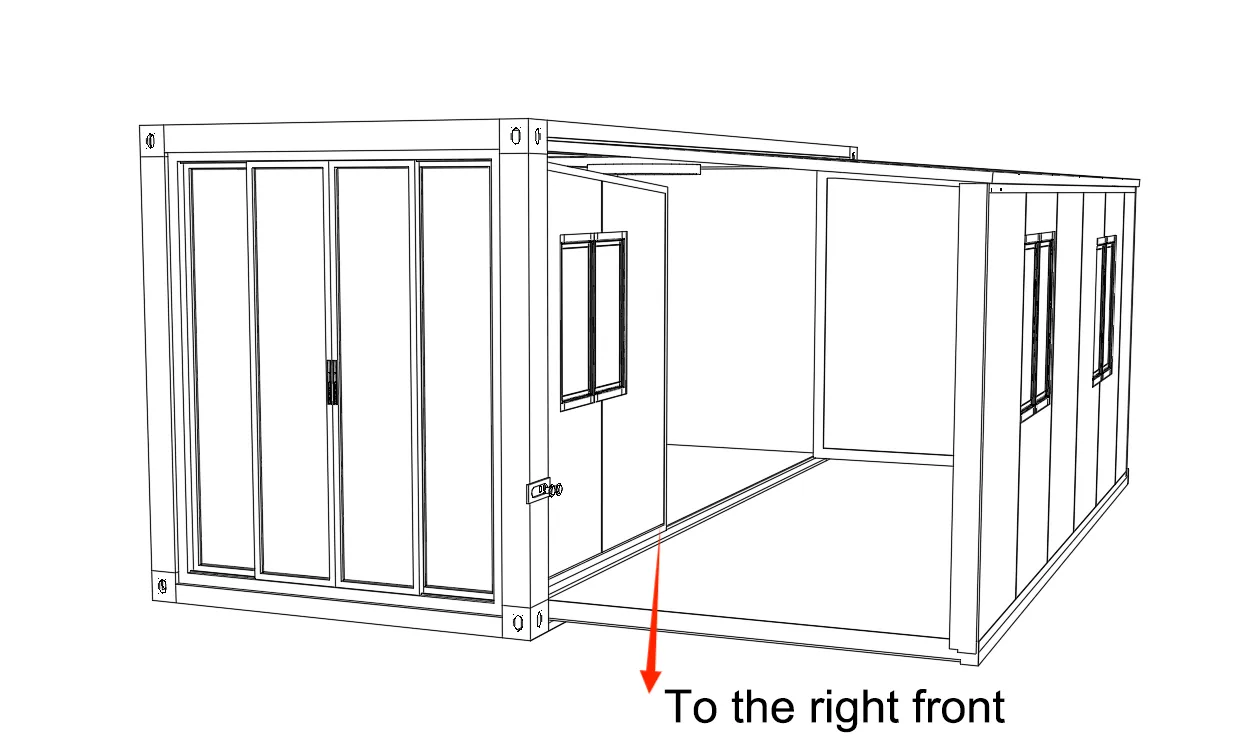
Expand the Left Side of the House
Follow the same steps used for the right side to expand the left side of the house.
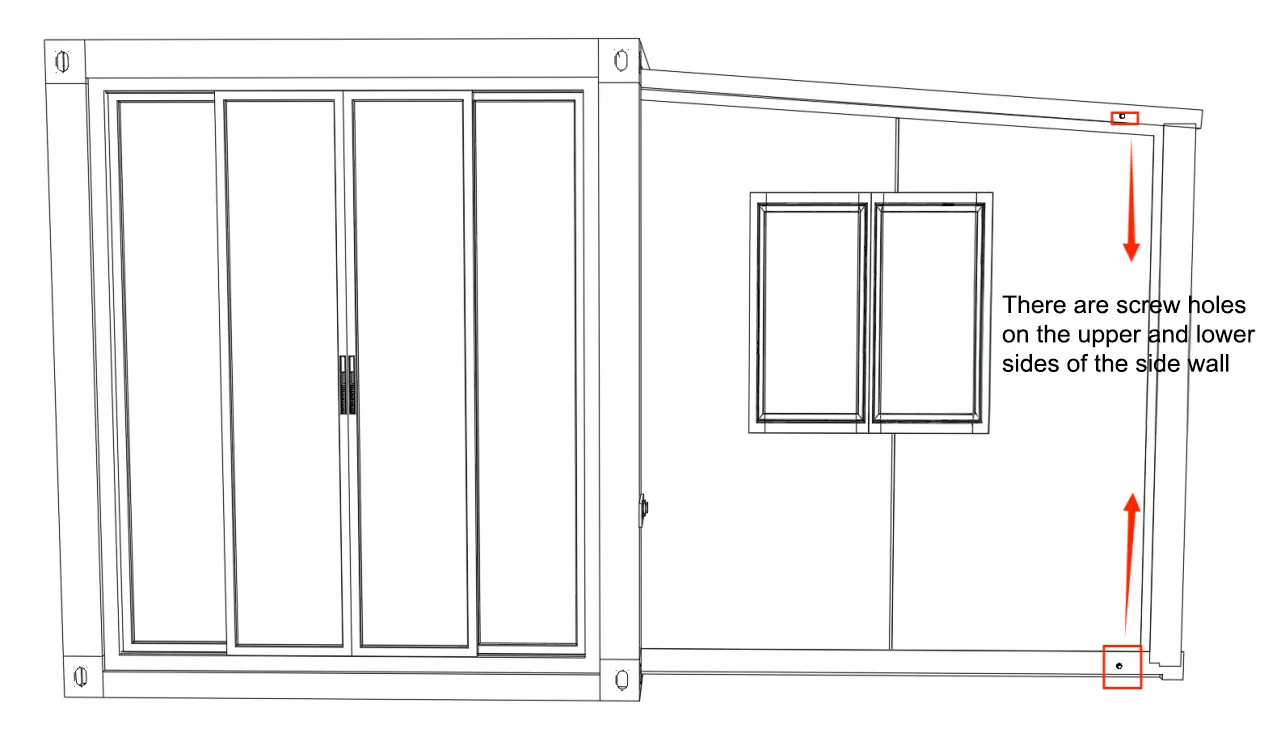
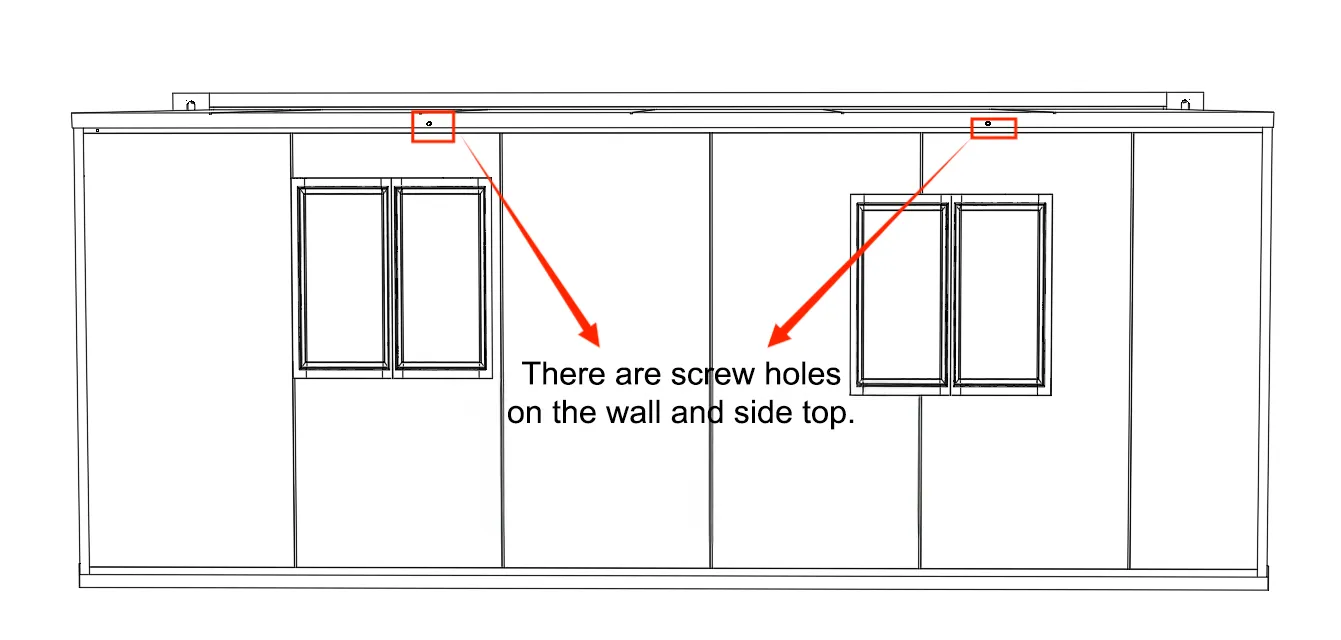
Screw Holes and Fixing Points
Small Walls
Screw holes are located at the top and bottom of the front and rear small walls.
Large Walls & Roof
Screw holes are present at designated positions on the left and right sides.
Tools & Screws
Use the screws and tools as indicated in the provided diagrams. Ensure all connections are securely fastened.
Installing Yellow Sealing Strips, Structural Adhesive & Stainless Steel Panels
Yellow Sealing Strips:
Structural Adhesive:
Stainless Steel Panels:
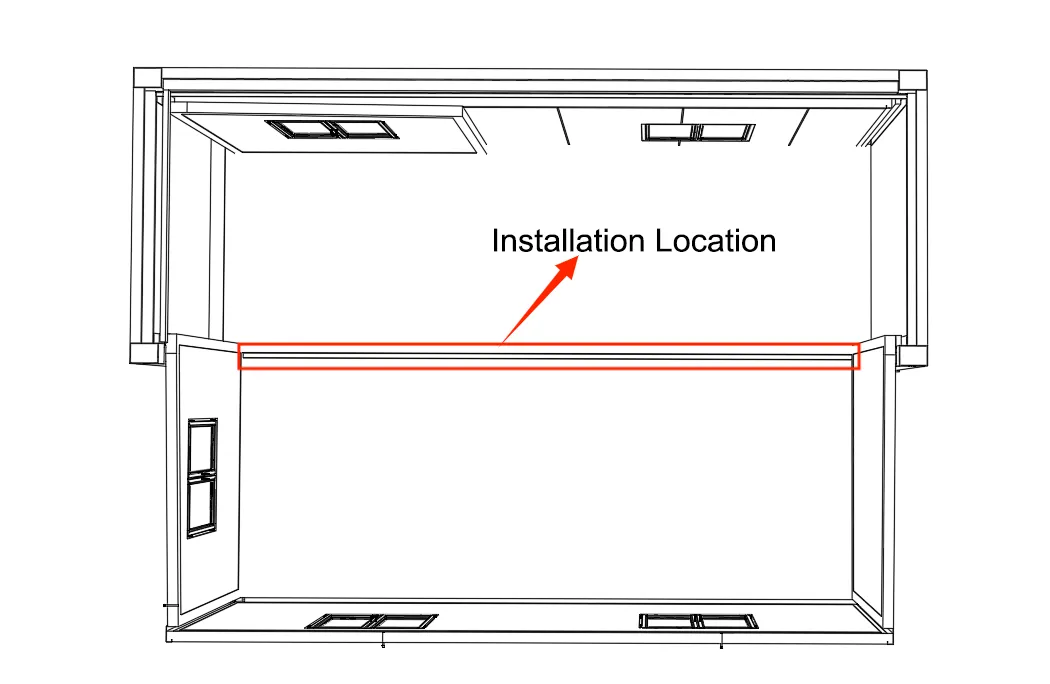
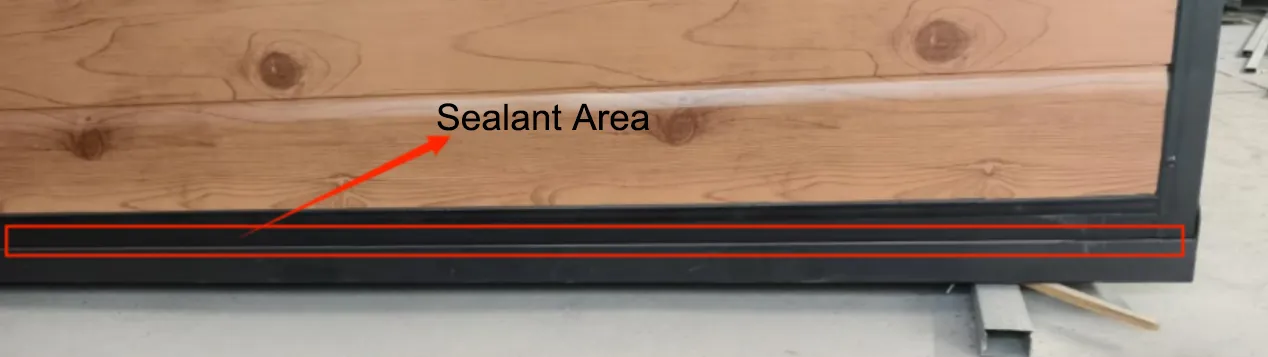
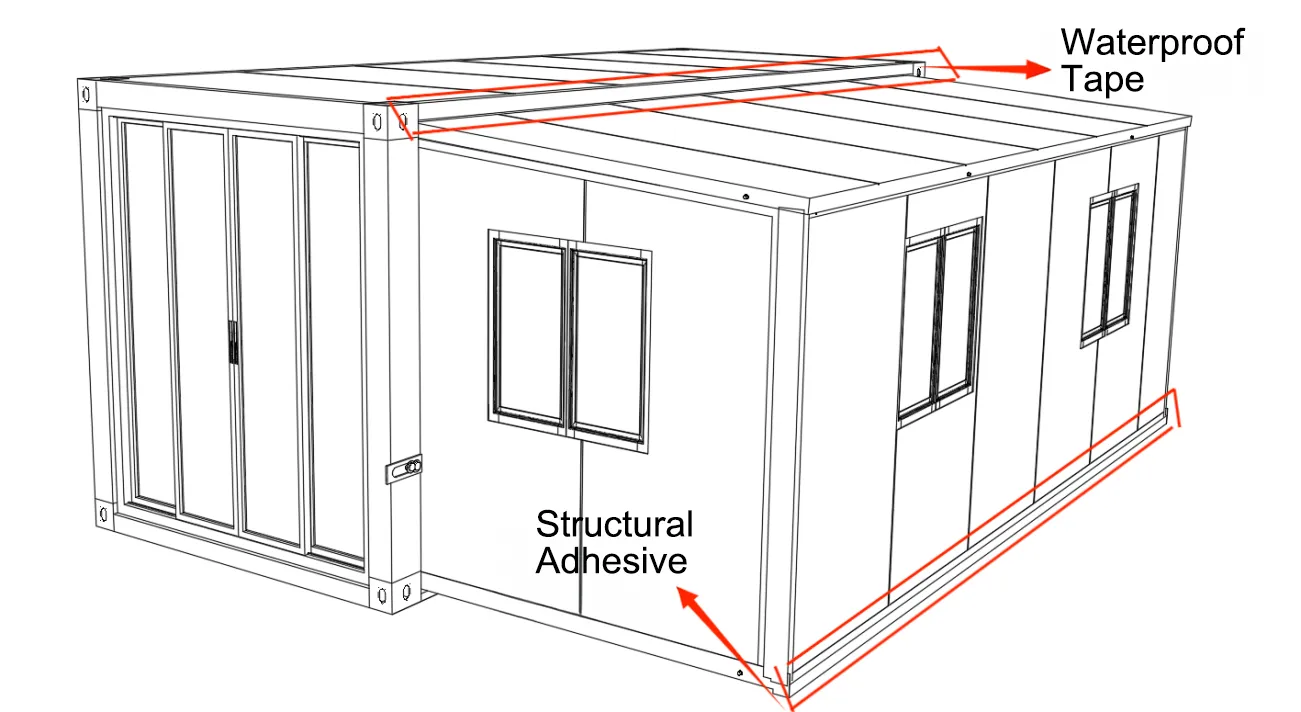
Using Structural Adhesive & Waterproof Tape
Structural Adhesive
Apply adhesive at the junctions of the side base and side large walls to ensure proper sealing and waterproofing.
Waterproof Strips
Attach waterproof strips at the seams between the side roof and the main roof for enhanced waterproof sealing.
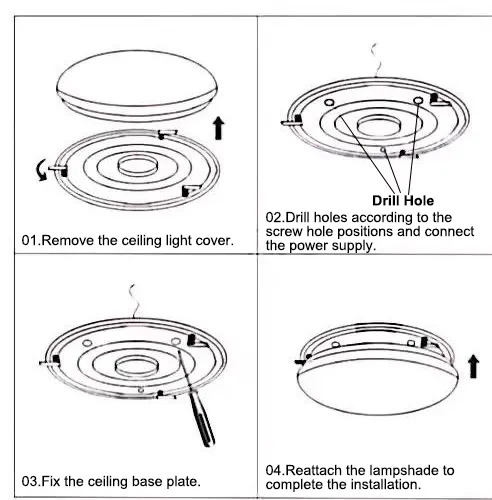
Bedroom Light Installation
Install bedroom lighting fixtures according to the provided instructions and ensure all connections are secure.
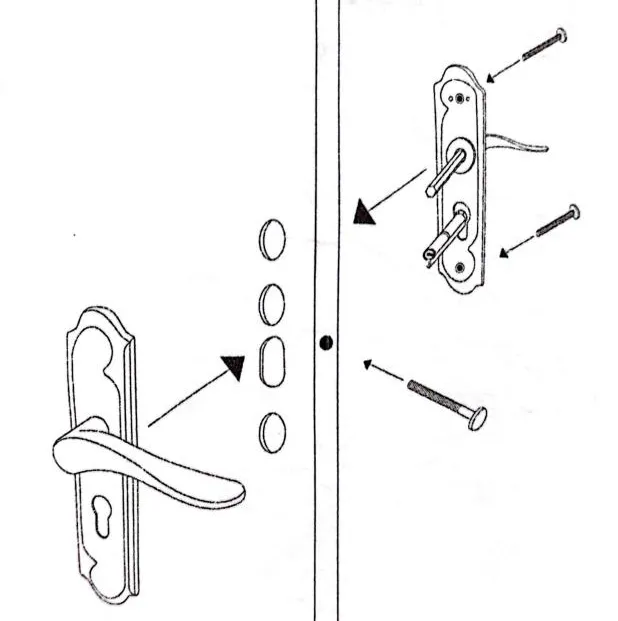
Bedroom Door Lock Installation
Mount and secure the door lock on the bedroom door according to the provided lock assembly instructions. Ensure proper alignment and functionality.
Socket & Lighting Switch Installation Guide
Based on Chinese National Standards. For non-standard configurations, this guide is for reference only.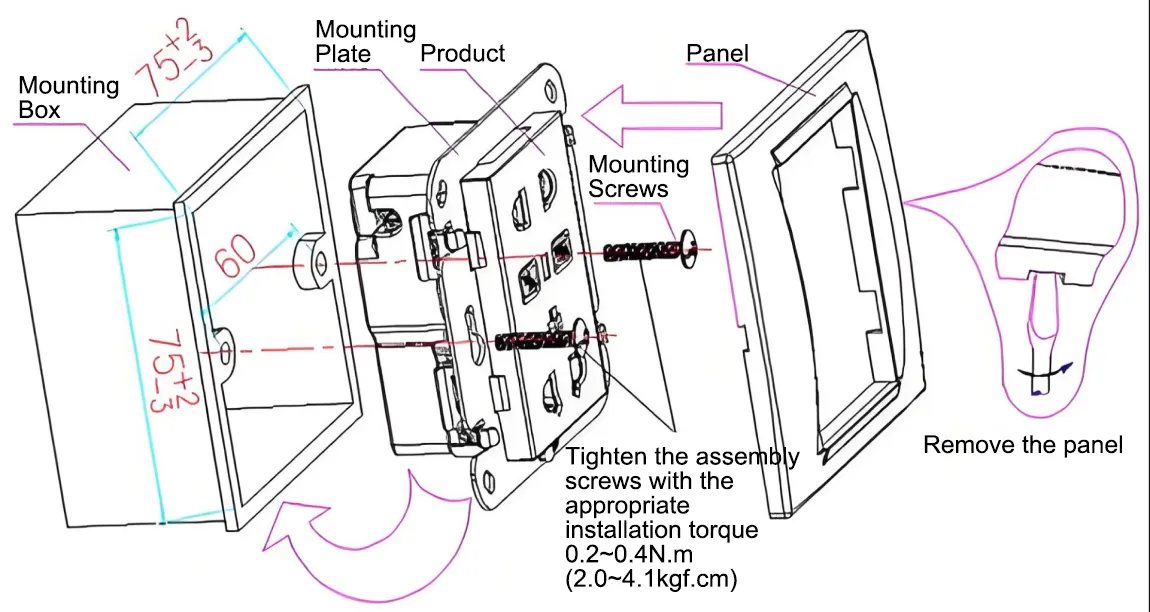
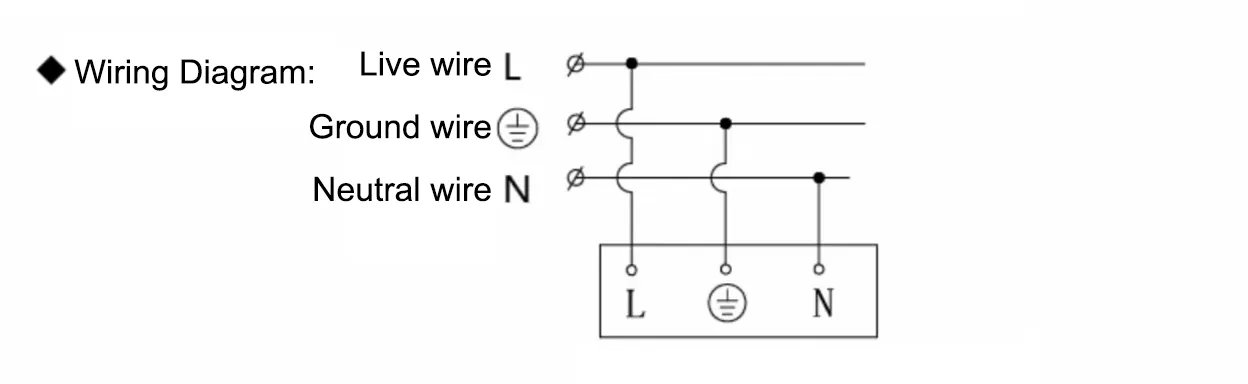
Socket Installation Steps
- Dismantle the socket to access the installation panel.
- Locate the wiring holes at the back of the panel and connect the wires as shown in Diagram 2.
- Insert the installation panel into the socket box and secure it using installation screws.
- Attach the front panel by snapping it into place to complete the installation.
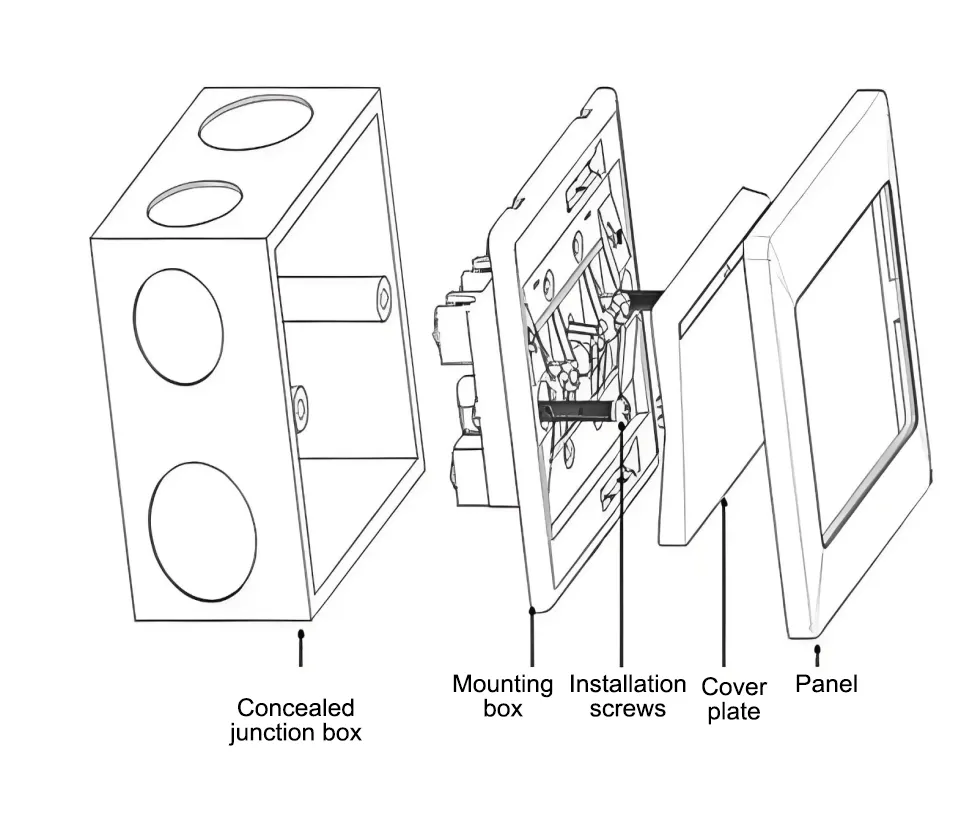
Lighting Switch Installation
- Disassemble the lighting switch to access the installation panel.
- Locate the wiring holes and wire the switch according to Diagram 2.
- Insert the installation panel into the back box after wiring.
- Secure the panel using installation screws.
- Attach the cover and front panel to complete the installation.
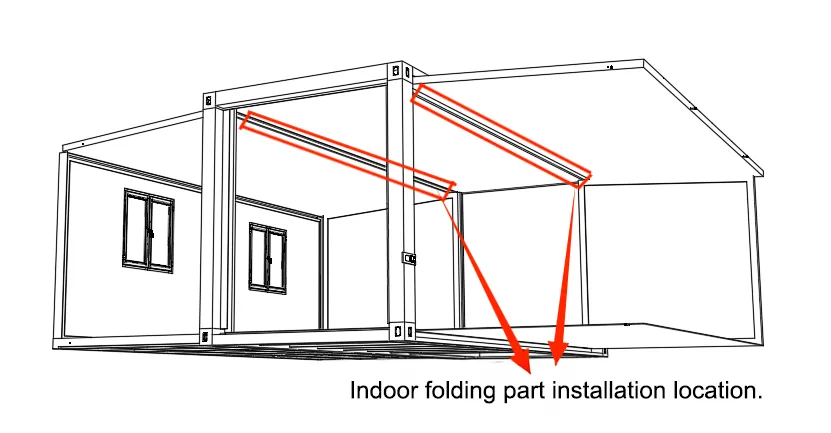
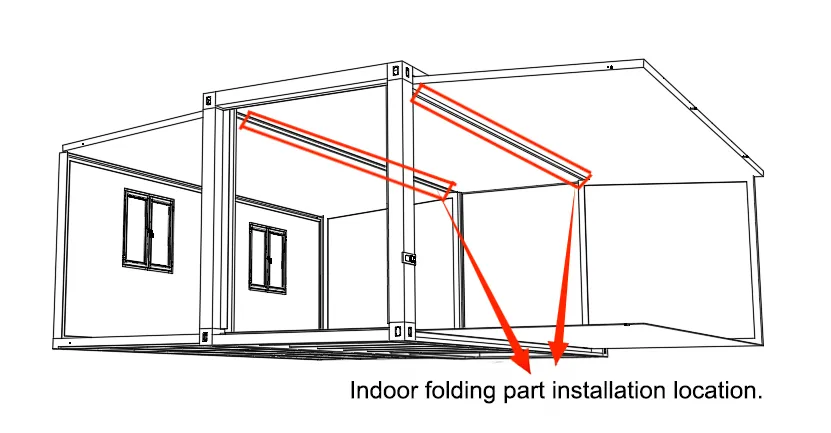
Indoor Ceiling Bracket Installation Instructions
Positioning the Indoor Bracket
Place the indoor bracket on the folding seam of the ceiling, ensuring the raised side is facing downward.
Fixing the Indoor Bracket
Use an electric drill and screws to securely attach the indoor bracket along the seam. Ensure the bracket is tightly fastened to prevent movement.
Contact Sunfine for Your Customizable Expandable House Solutions
At Sunfine, we specialize in designing and building expandable container houses and expandable homes tailored to your specific needs.
Whether you’re looking for a foldable house or a folding house that offers flexible and efficient housing solutions, we have the expertise and experience to deliver high-quality, durable products.